|
|
# Spring Cloud Alibaba Sidecar Example
|
|
|
|
|
|
## 项目说明
|
|
|
|
|
|
本项目演示如何使用 Nacos + Spring Cloud Alibaba Sidecar 完成 异构语言微服务的接入。
|
|
|
|
|
|
[Spring Cloud Alibaba Sidecar](https://spring-cloud-alibaba-group.github.io/github-pages/hoxton/zh-cn/index.html#_spring_cloud_alibaba_sidecar) 是一个用来快速完美整合 Spring Cloud 与 异构语言微服务 的框架
|
|
|
|
|
|
|
|
|
|
|
|
## 准备工作
|
|
|
|
|
|
### 下载并启动 Nacos
|
|
|
|
|
|
**在接入 Sidecar 之前,首先需要启动 Nacos服务器。**
|
|
|
|
|
|
1. 下载[Nacos二进制文件](https://github.com/alibaba/nacos/releases/download/2.1.0/nacos-server-2.1.0.zip) 并解压
|
|
|
|
|
|
2. 启动 Nacos Server
|
|
|
|
|
|
下载解压后 我们需要进入到 bin 目录启动 nacos 服务, 一定不要双击启动,双击默认会以集群方式启动,我们以单机方式启动。
|
|
|
```bash
|
|
|
startup.cmd -m standalone
|
|
|
```
|
|
|
|
|
|
3. 登录 Nacos
|
|
|
|
|
|
我们来到浏览器 输入localhost:8848/nacos 可以看到Nacos的运行的界面
|
|
|
用户名和密码都是 `nacos`
|
|
|
|
|
|
|
|
|
## 简单示例
|
|
|
本文以Nacos作为注册中心为例,Sidecar接入一个非Java语言的服务。
|
|
|
|
|
|
|
|
|
### Step1: 引入依赖
|
|
|
|
|
|
修改 `pom.xml` 文件,引入 Spring Cloud Alibaba Sidecar Starter。
|
|
|
|
|
|
```xml
|
|
|
|
|
|
<dependency>
|
|
|
<groupId>org.springframework.cloud</groupId>
|
|
|
<artifactId>spring-cloud-starter-gateway</artifactId>
|
|
|
</dependency>
|
|
|
|
|
|
<dependency>
|
|
|
<groupId>com.alibaba.cloud</groupId>
|
|
|
<artifactId>spring-cloud-starter-alibaba-sidecar</artifactId>
|
|
|
</dependency>
|
|
|
|
|
|
<dependency>
|
|
|
<groupId>com.alibaba.cloud</groupId>
|
|
|
<artifactId>spring-cloud-starter-alibaba-nacos-discovery</artifactId>
|
|
|
</dependency>
|
|
|
|
|
|
```
|
|
|
|
|
|
### Step2: 配置 Sidecar 相关信息
|
|
|
然后在项目的application.yml 文件中指定以下配置
|
|
|
```yaml
|
|
|
server:
|
|
|
port: 8070
|
|
|
spring:
|
|
|
cloud:
|
|
|
nacos:
|
|
|
username: nacos
|
|
|
password: nacos
|
|
|
discovery:
|
|
|
server-addr: 127.0.0.1:8848
|
|
|
group: test
|
|
|
gateway:
|
|
|
discovery:
|
|
|
locator:
|
|
|
enabled: true
|
|
|
|
|
|
application:
|
|
|
name: node-service
|
|
|
# sidecar 相关的配置
|
|
|
sidecar:
|
|
|
# 异构微服务的IP
|
|
|
ip: 127.0.0.1
|
|
|
# 异构微服务的端口
|
|
|
port: 8060
|
|
|
|
|
|
# 异构微服务的健康检查URL(这里不配置的话,默认会认为是UP)
|
|
|
health-check-url: http://localhost:8060/health.json
|
|
|
# springboot actuator监控相关
|
|
|
management:
|
|
|
endpoint:
|
|
|
health:
|
|
|
show-details: always
|
|
|
```
|
|
|
注意:这里的 localhost:8060,是我本机起了一个nginx 代理了这个health.json的请求。在实际使用过程中可以是任意的REST服务,只需要返回正确的JSON格式的健康检测数据即可。
|
|
|
```json
|
|
|
|
|
|
{
|
|
|
"status": "DOWN"
|
|
|
}
|
|
|
```
|
|
|
|
|
|
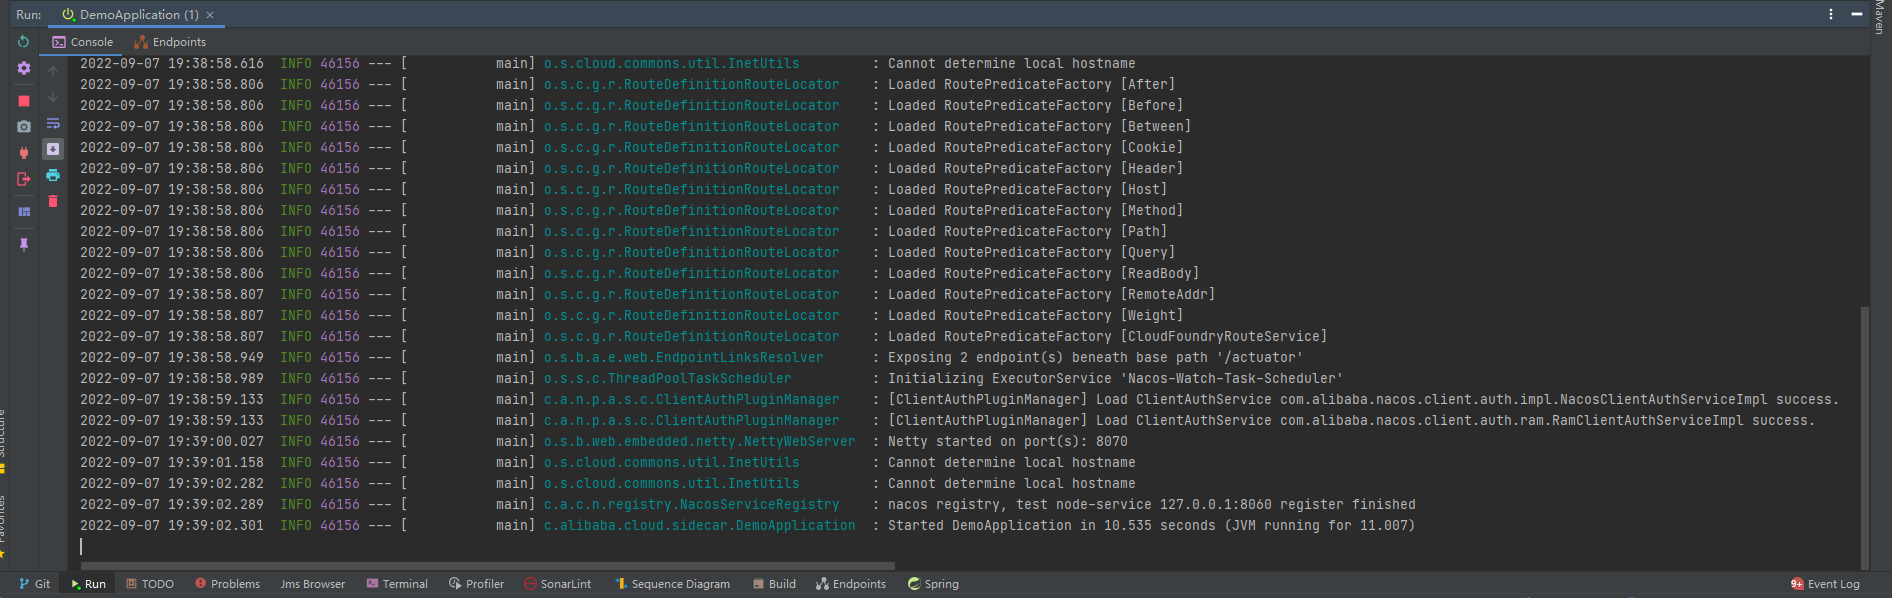
### Step3: 启动应用
|
|
|
之后分别启动 Sidecar 服务、本地异构服务。
|
|
|
|
|
|
IDE 直接启动:找到主类 `com.alibaba.cloud.sidecar.DemoApplication`,执行 main 方法启动应用。
|
|
|
|
|
|
注意:本文是以 `spring-cloud-alibaba-sidecar-nacos-example`项目为例,所以启动的是它下面的`DemoApplication`启动类。
|
|
|
|
|
|
|
|
|
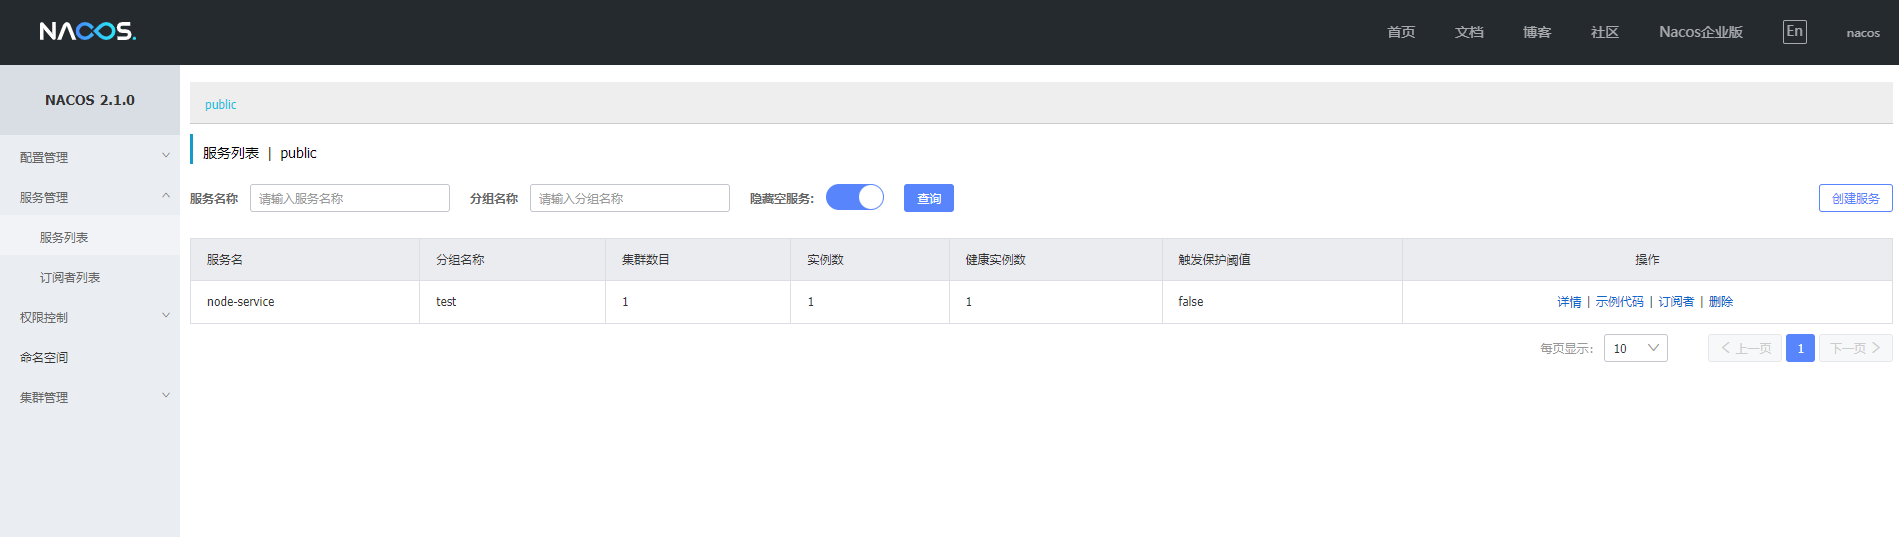
### Step4: 查看服务注册情况
|
|
|
|
|
|
|
|
|
|
|
|
|
|
|
|
|
|
|
|
|
### Step4: 访问异构服务
|
|
|
完成上面4步,我们发现对应的服务`node-service`已经成功注册到了注册中心。此时,这个服务已经成功的融入到了Spring Cloud 微服务的怀抱。对于Spring Cloud 微服务而言,访问它跟访问其它的Java微服务没有任何的区别。
|
|
|
而这,也正是 Spring Cloud Alibaba Sidecar的魅力所在。接下来,我们将继续演示怎样访问这个服务。
|
|
|
|
|
|
浏览器访问
|
|
|
http://127.0.0.1:8070/node-service/health.json
|
|
|
能调通则说明整合成功。
|
|
|
|
|
|

|
|
|
|
|
|
## More
|
|
|
|
|
|
如果您对 spring cloud starter alibaba sidecar 有任何建议或想法,欢迎在 issue 中或者通过其他社区渠道向我们提出。
|
|
|
|